Courses
The Courses module turns your membership site into a small learning platform. A course is a page that describes it, plus a set of lessons in order, grouped into modules. Students see their progress, mark lessons complete, take short quizzes, and get a certificate at the end.
Courses are built on the same access engine as the rest of Membership, so you do not run a second system:
- you choose which plans include a course (a Member plan could include every course), or make it free with an account, or open to everyone;
- with the Payments module, you can also sell a course on its own to people who do not want a plan;
- lessons are locked like any other protected content, in lists, search, feeds and the REST API too.
Throughout this page the example is the Larkspur Garden Club's course Growing vegetables from seed, with two modules ("Getting started" and "Sowing") and a short quiz.
Before you start: switch the module on
Courses is a module and is off by default.
- Go to Unyson+ → Membership → Modules.
- Switch on Courses ("Courses with lessons, progress, quizzes and certificates on the same access rules.").
- Click Save modules.
A new Courses menu appears in the WordPress admin menu, with Courses and Lessons under it. The Membership sidebar also gets a Courses item that opens the same list.
Step 1: create the course
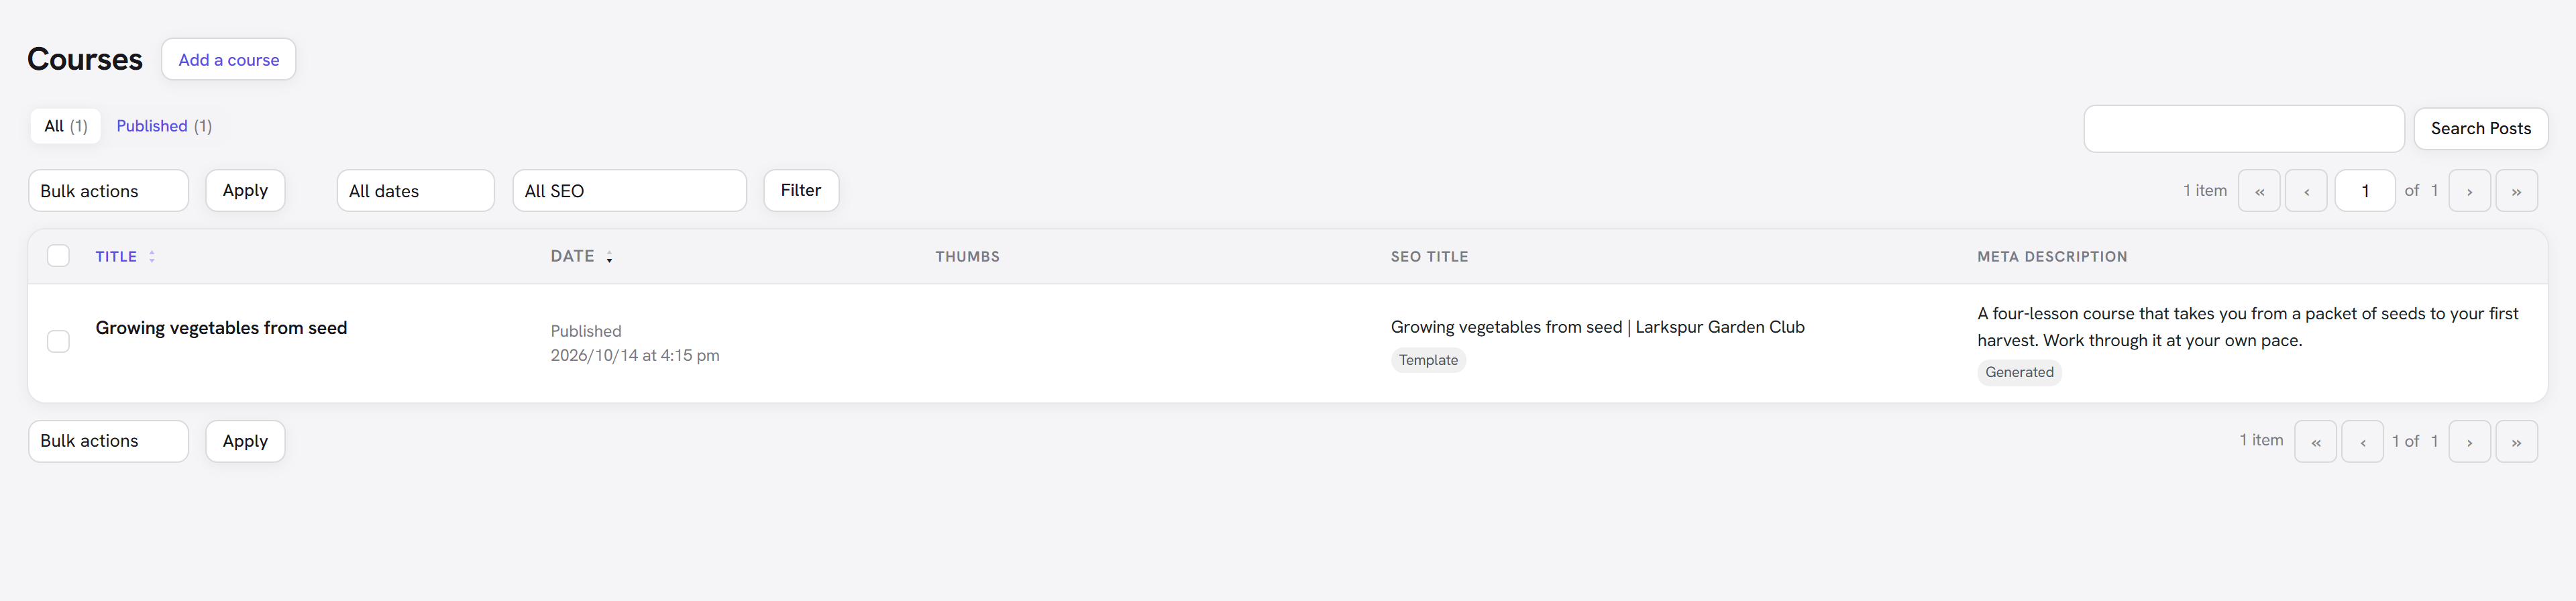
- Go to Courses → Courses and click the add button at the top of the list. The new screen is titled Add a course.
- Type the course title, "Growing vegetables from seed".
- Write the course description in the editor: what students will learn, who it is for, how long it takes. You can add a featured image and an excerpt, as for a post.
- In the Who can take this course box, choose who may open the lessons (see the options below). For our example: Members of these plans with Member ticked (Pro includes Member, so Pro members get it too).
- If you want a certificate, tick Give a certificate when the course is completed in the Certificate box.
- Click Publish.
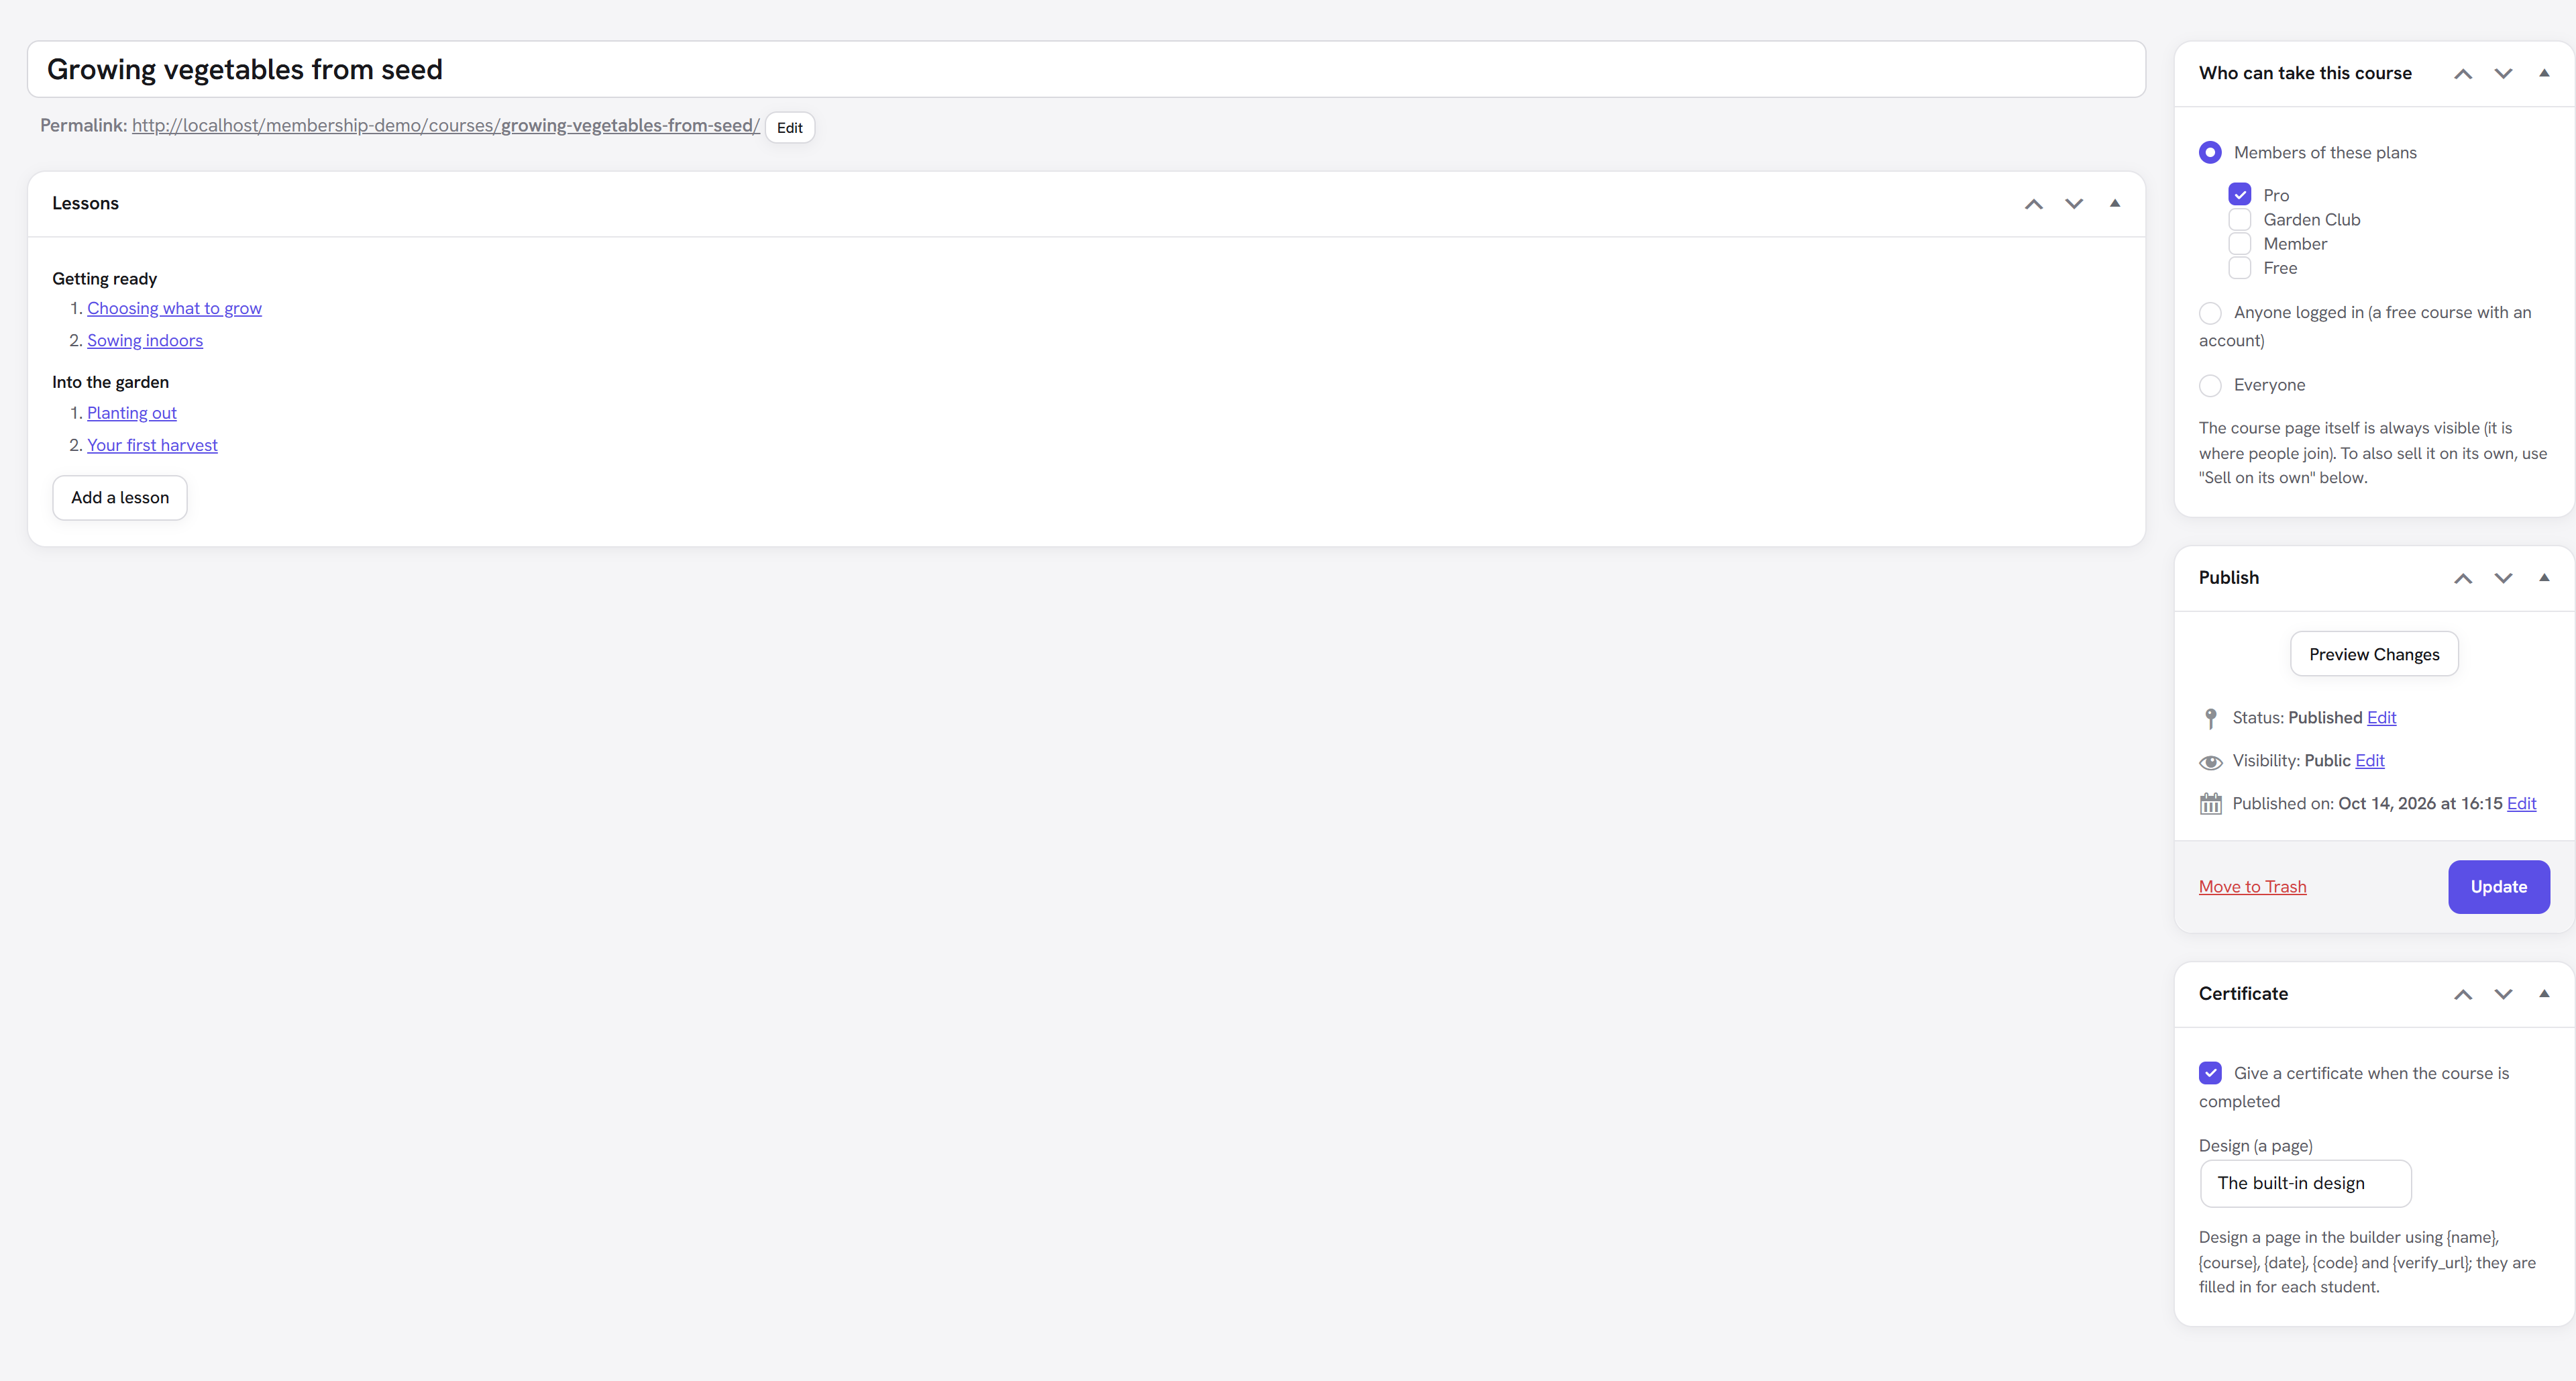
The course page is always visible, to everyone: it is the page where people find out about the course and join it. Only the lessons are locked.
Step 2: add the lessons
Once the course is saved, its Lessons box shows an Add a lesson button.
- Click Add a lesson in the course's Lessons box. (Or go to Courses → Lessons and add one there, on the screen titled Add a lesson; then pick the course yourself.)
- Type the lesson title, for example "Choosing your seeds", and write the lesson in the editor. Lessons can hold anything a page can: text, images, video, and a Member Download button for a worksheet.
- In the Lesson box:
- Course is already set to "Growing vegetables from seed".
- Type the Module name: "Getting started".
- Leave Opens after (days) at
0so it opens at once.
- In the attributes box (WordPress heads it Post Attributes), set the Order number:
1. - Click Publish.
- Repeat for each lesson: "Preparing seed trays" (module "Getting started", order
2), "Sowing indoors" (module "Sowing", order3), "Hardening off" (module "Sowing", order4).
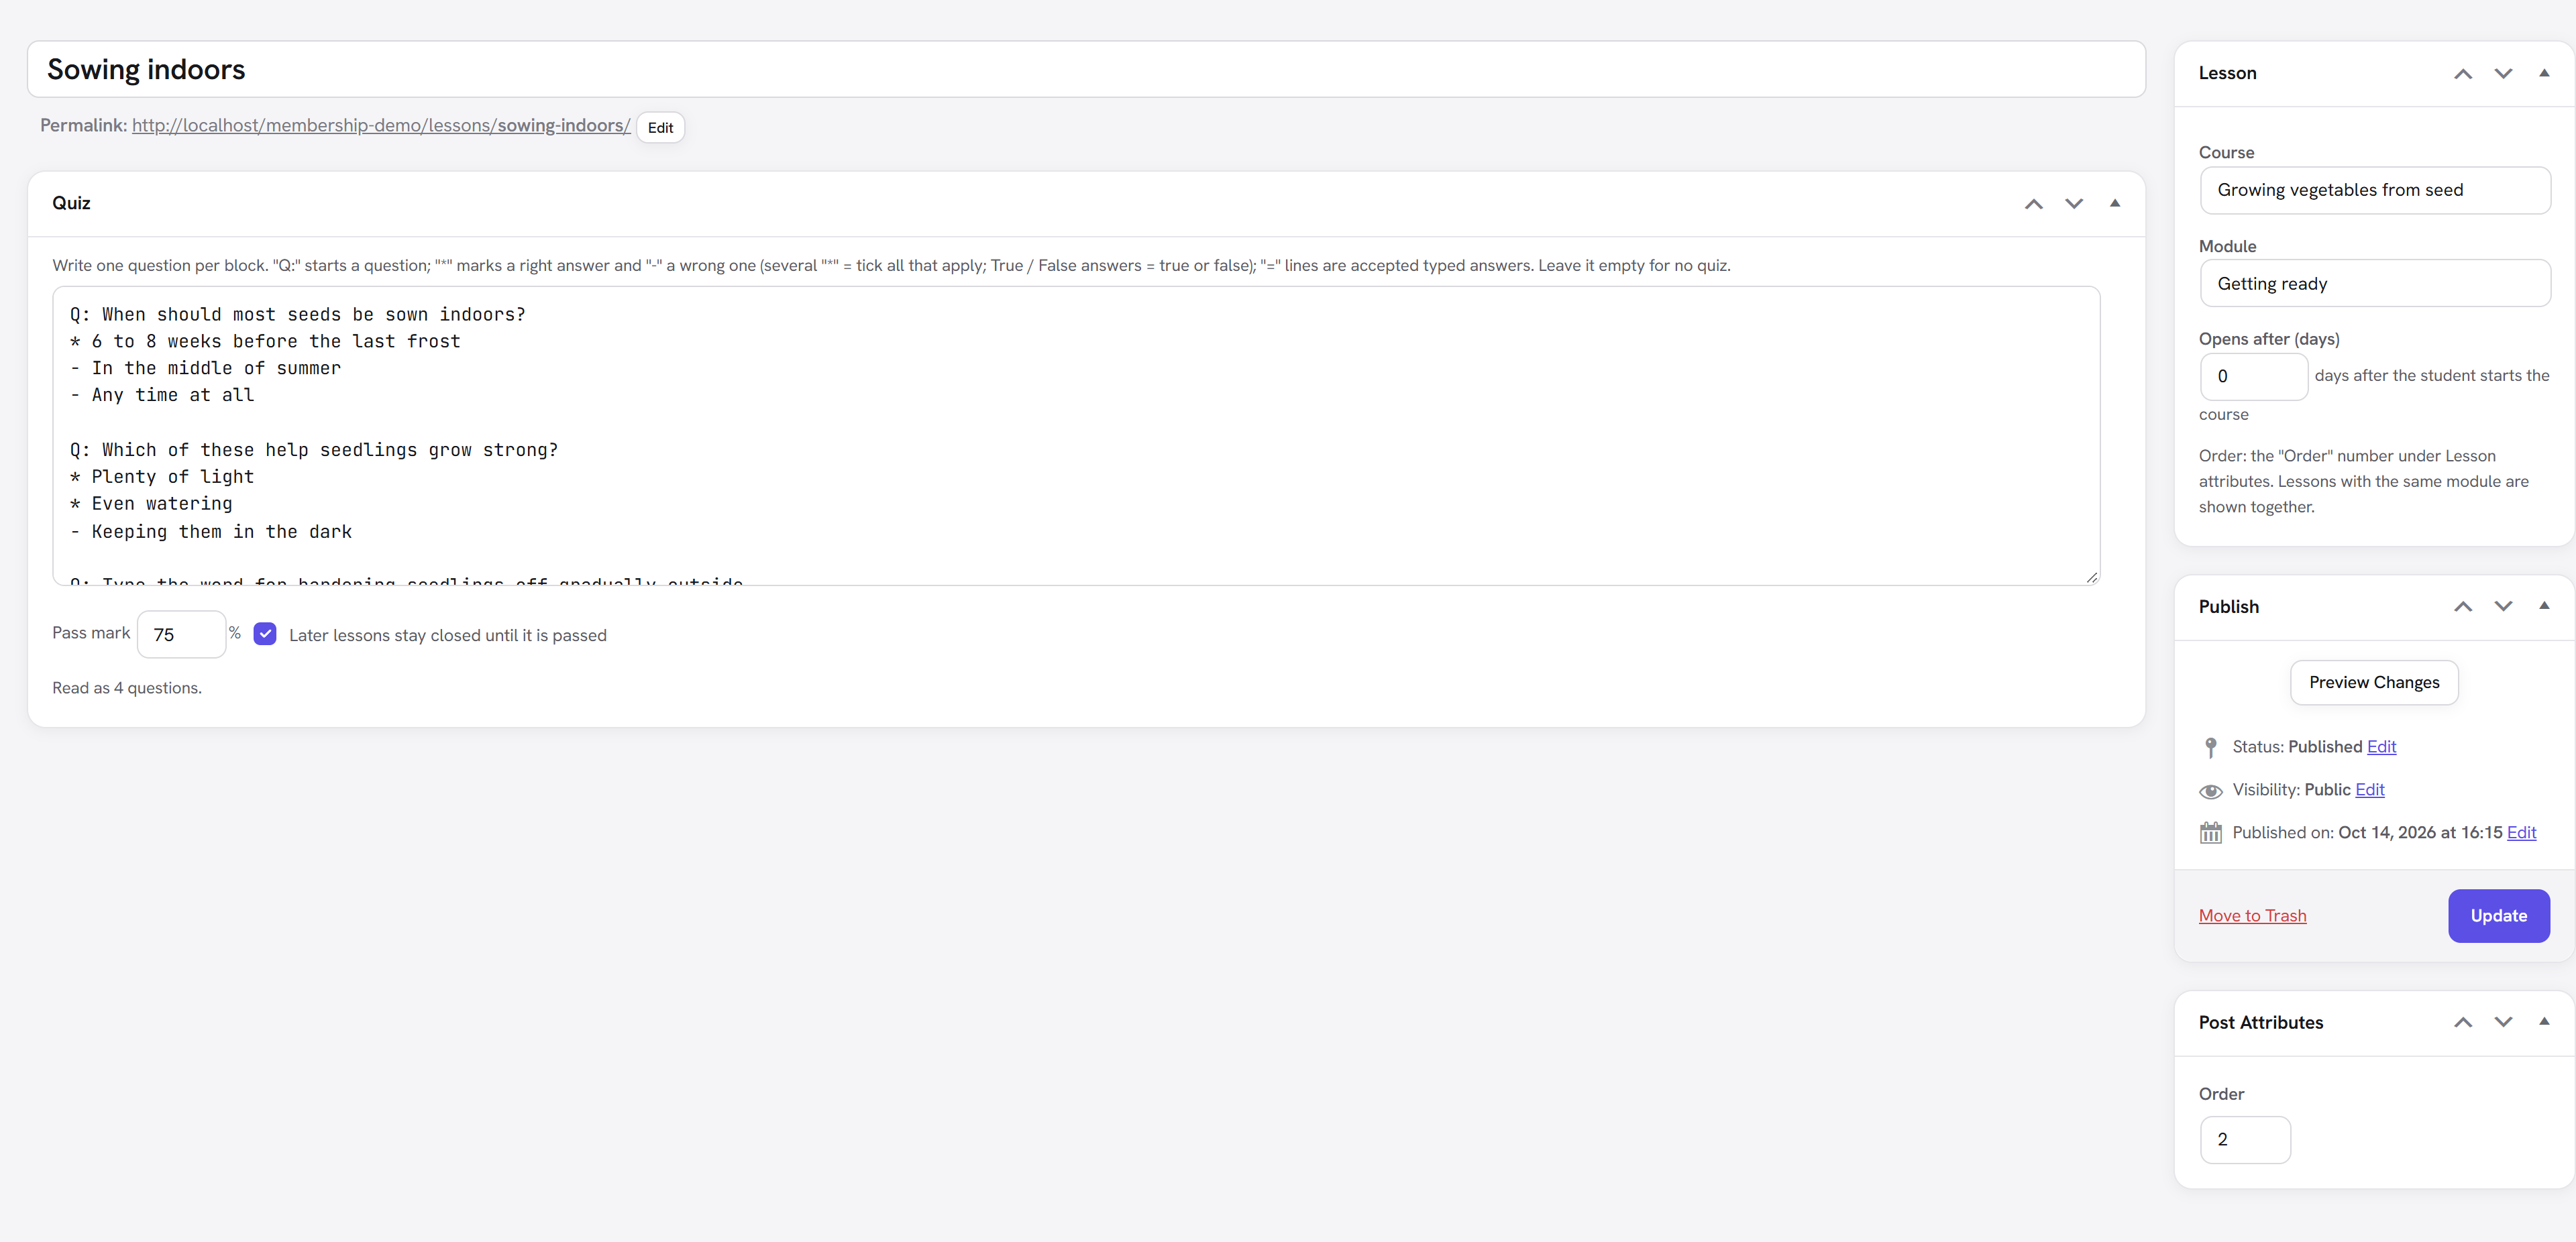
Back on the course, the Lessons box now lists the lessons in order under their module headings. Click any of them to edit it.
Every option explained
The course boxes
Who can take this course
This decides who may open the lessons.
| Choice | What it means | When to use it |
|---|---|---|
| Members of these plans | Only holders of the ticked plans (or of a plan that includes one of them). | The usual choice for a paid membership: the course is a benefit of the plan. |
| Anyone logged in (a free course with an account) | Anyone with an account on your site, no plan needed. | A free introductory course that builds your email list. |
| Everyone | No restriction; the lessons are open to all visitors. | A fully public course. Progress, quizzes and certificates still need the student to be logged in. |
Default: Members of these plans (with nothing ticked, until you tick a plan). The box note reads: "The course page itself is always visible (it is where people join). To also sell it on its own, use "Sell on its own" below."
:::info The course's access rule Behind the scenes, every course keeps one access rule named Course: followed by the course title. It protects the course's lessons (as Pages under a page, on the course) and is updated each time you save the course. You can see it under Unyson+ → Membership → Access rules, but change who can take the course in the course's own box, not in the rule: saving the course rewrites the rule. A course set to Everyone has no rule. The rule is switched on while the course is published, and deleted when the course is deleted. :::
Lessons
Lists the course's lessons in order, grouped by module, with an Add a lesson button (shown once the course has been saved at least once). "No lessons yet." means the course is empty.
Certificate
| Field | What it does | Default |
|---|---|---|
| Give a certificate when the course is completed | Issues a certificate to each student who completes every lesson, and emails it to them. | Off |
| Design (a page) | The page used as the certificate's design. The built-in design uses a ready-made layout; or pick any published page you have designed in the page builder. | The built-in design |
The box note: "Design a page in the builder using {name}, {course}, {date}, {code} and {verify_url};
they are filled in for each student." See Certificates below.
Sell on its own
Appears only while the Payments module is on. See Selling a course on its own.
The lesson boxes
Lesson
| Field | What it does | Default | Tip |
|---|---|---|---|
| Course | Which course the lesson belongs to. | "— choose —" (none), or the course you came from | A lesson with no course is not part of any course and is not protected by one. |
| Module | The module heading the lesson appears under, such as "Getting started". | Empty (no heading) | Give the lessons of one module consecutive order numbers. The outline starts a new heading whenever the module name changes from one lesson to the next, so a module split by another module's lesson would appear twice. |
| Opens after (days) | The lesson opens this many "days after the student starts the course". | 0 (at once) | Use it to pace a course: week 1 at 0, week 2 at 7, and so on. |
The box note: "Order: the "Order" number under Lesson attributes. Lessons with the same module are shown together."
Order (in the attributes box)
The standard WordPress Order field, in the box WordPress heads Post Attributes (the Lesson box calls
it "Lesson attributes"). Lessons are listed from the lowest number to the highest (lessons with
the same number keep the order they were created in). Number them 1, 2, 3… or 10, 20, 30… to
leave room for lessons you add later.
Quiz
| Field | What it does | Default |
|---|---|---|
| The quiz text | The questions, written as plain text in the format below. Leave it empty for no quiz. | Empty |
| Pass mark | The score (in %) needed to pass, from 1 to 100. | 70 |
| Later lessons stay closed until it is passed | When ticked, every lesson after this one stays closed until the student passes this quiz. | Off |
After saving, the box shows "Read as N questions." so you can check the quiz was understood.
The Lessons list
Courses → Lessons lists every lesson with two extra columns, Course and Module, so you can see at a glance where each lesson belongs.
Writing a quiz
Quizzes are written in the lesson's Quiz box as plain text. The rules:
- A line starting with
Q:starts a new question. - A line starting with
*is a right answer. - A line starting with
-is a wrong answer. - A line starting with
=is an accepted typed answer. - Blank lines between questions are fine (and make the text easier to read).
The type of each question follows from what you write:
| You write | The student sees |
|---|---|
One * and some - | Single choice: pick one answer (radio buttons). |
Several * | Tick all that apply: the student must tick all the right answers and none of the wrong ones. |
Exactly two answers, True and False | True or false. |
Only = lines, no * or - | A typed answer. Any of the = answers is accepted; capital letters and extra spaces do not matter. |
Example, for the lesson "Sowing indoors":
Q: How deep should most small seeds be sown?
* About twice their own size
- As deep as possible
- On top of the soil, uncovered, always

Q: Which of these help seedlings grow strong?
* Plenty of light
* A gentle breeze or brushing
- Keeping the soil soaking wet

Q: Seeds need light to germinate in every case.
- True
* False

Q: What do we call moving seedlings to bigger pots?
= pricking out
= potting on
That is four questions: a single choice, a tick-all-that-apply, a true-or-false and a typed answer.
Scoring: each question is right or wrong (a tick-all question is right only when exactly the right answers are ticked). The score is the percentage of questions answered correctly. With the default pass mark of 70%, a student needs 3 of these 4 right.
What students see
The course page
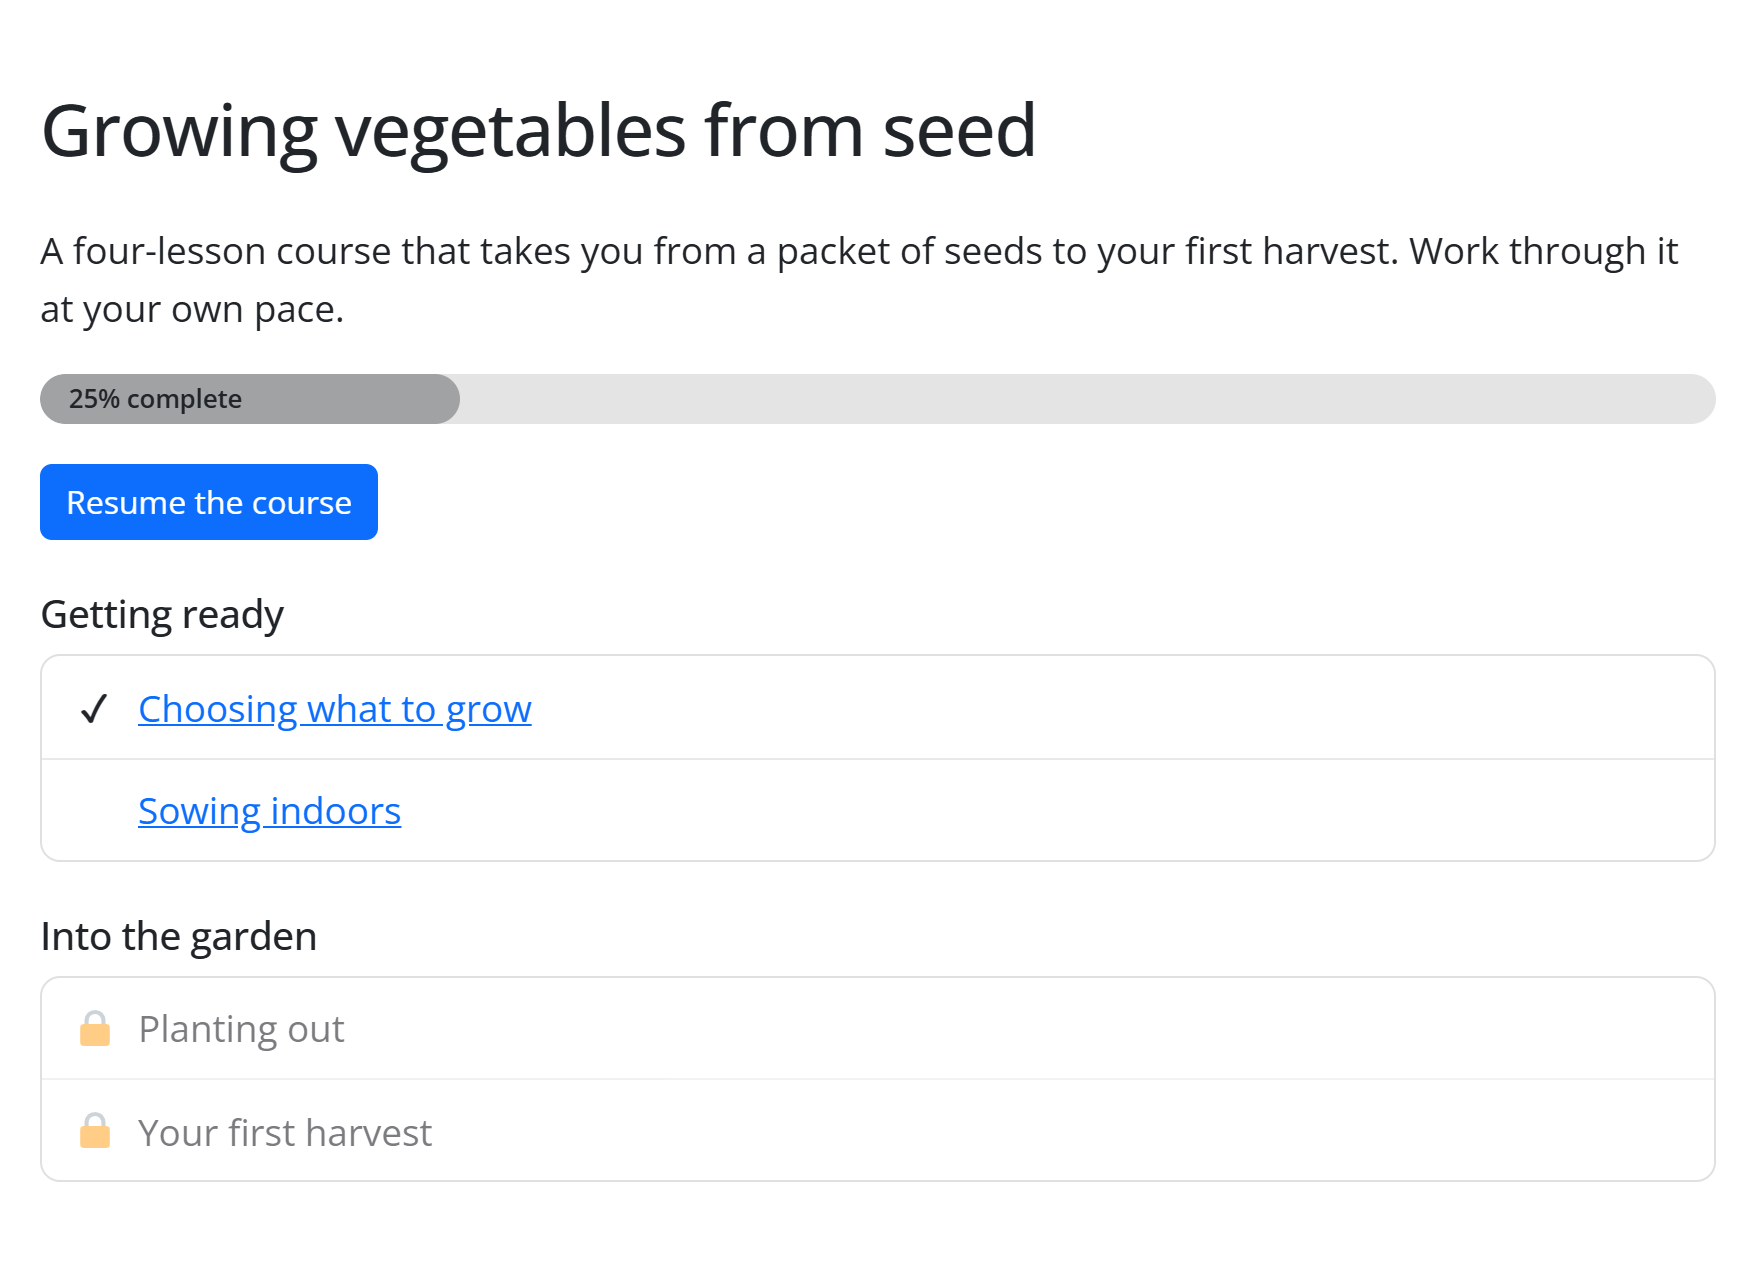
Below your course description, the course page shows the outline:
- For a student who may take the course: a progress bar ("N% complete") and a Start the course button, which becomes Resume the course once they have completed a lesson. The button goes to the first lesson they have not completed yet. When everything is done, the button disappears.
- The module headings, and each lesson. A completed lesson has a tick (✓). A lesson that is not open yet (dripped, or behind a quiz) has a padlock and no link.
- For someone who may not take it: a box titled Join to take this course (or Log in to take this course, for a course for anyone logged in), the plans it is Included in, a Buy this course for button when it is for sale on its own, and a Log in button for visitors. Every lesson shows a padlock.
A lesson
A lesson page shows, around your lesson content:
- a breadcrumb back to the course and the module name;
- the progress bar for the course;
- the quiz, if the lesson has one;
- links to the previous and next lessons, in the course's own order. These are Membership's links; the theme's usual previous / next post links (which follow publishing dates) are not shown on lessons;
- a Complete and continue button, which marks the lesson complete and moves on to the next one. On the last lesson it reads Complete the course. Once a lesson is complete, the button is replaced by "✓ Completed".
If the lesson has a quiz, the complete button only appears after the quiz is passed.
If a lesson is not open yet for this student, they see the breadcrumb, the progress bar and a box titled Not open yet with the reason, for example "This lesson opens on 14 May 2027." or "Pass the quiz in “Sowing indoors” first."
A student is enrolled in a course the first time they open one of its lessons. That date is the start for every lesson's Opens after (days).
Taking a quiz
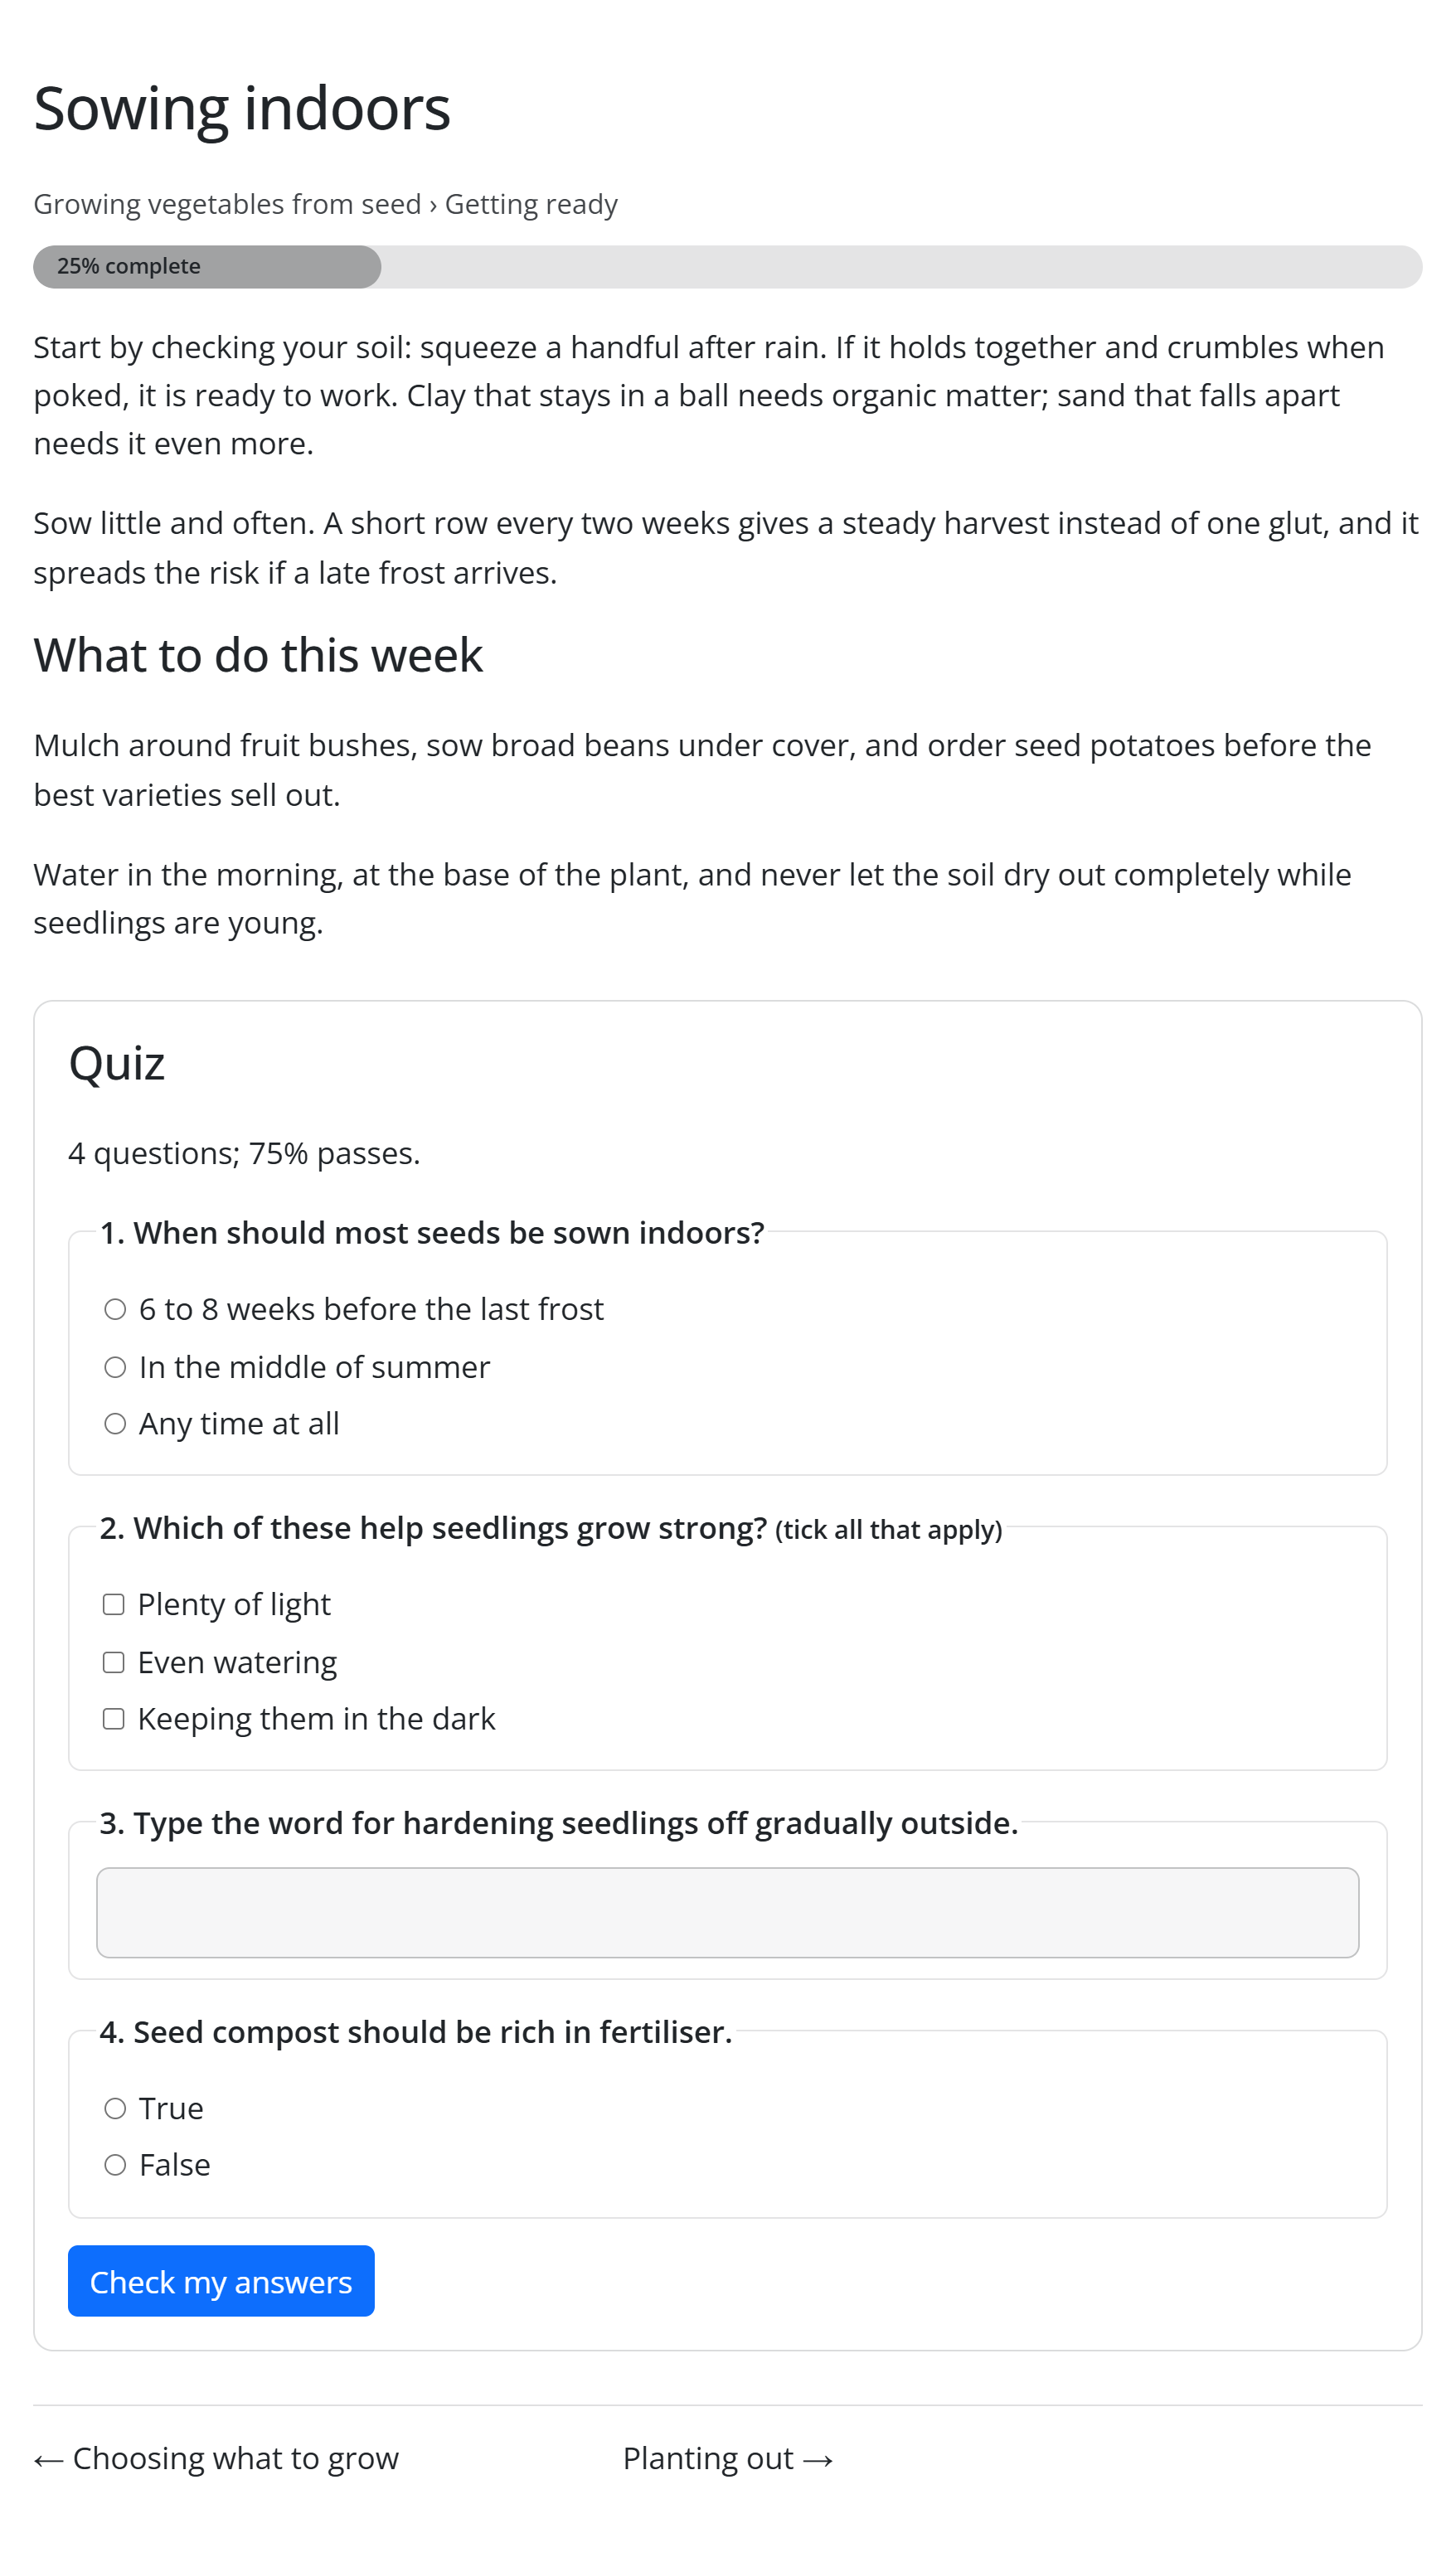
The quiz appears under the lesson, headed Quiz, with a line like "4 questions; 70% passes." Questions with several right answers say "(tick all that apply)". The student answers and clicks Check my answers.
- Passed: "Passed with 75%. Well done!" The Complete and continue button now appears.
- Not passed: "You scored 50%; 70% passes. Have another go." Questions are marked right or wrong, and the form is there to try again. There is no limit on attempts.
- Coming back later to a passed quiz: "You passed this quiz."
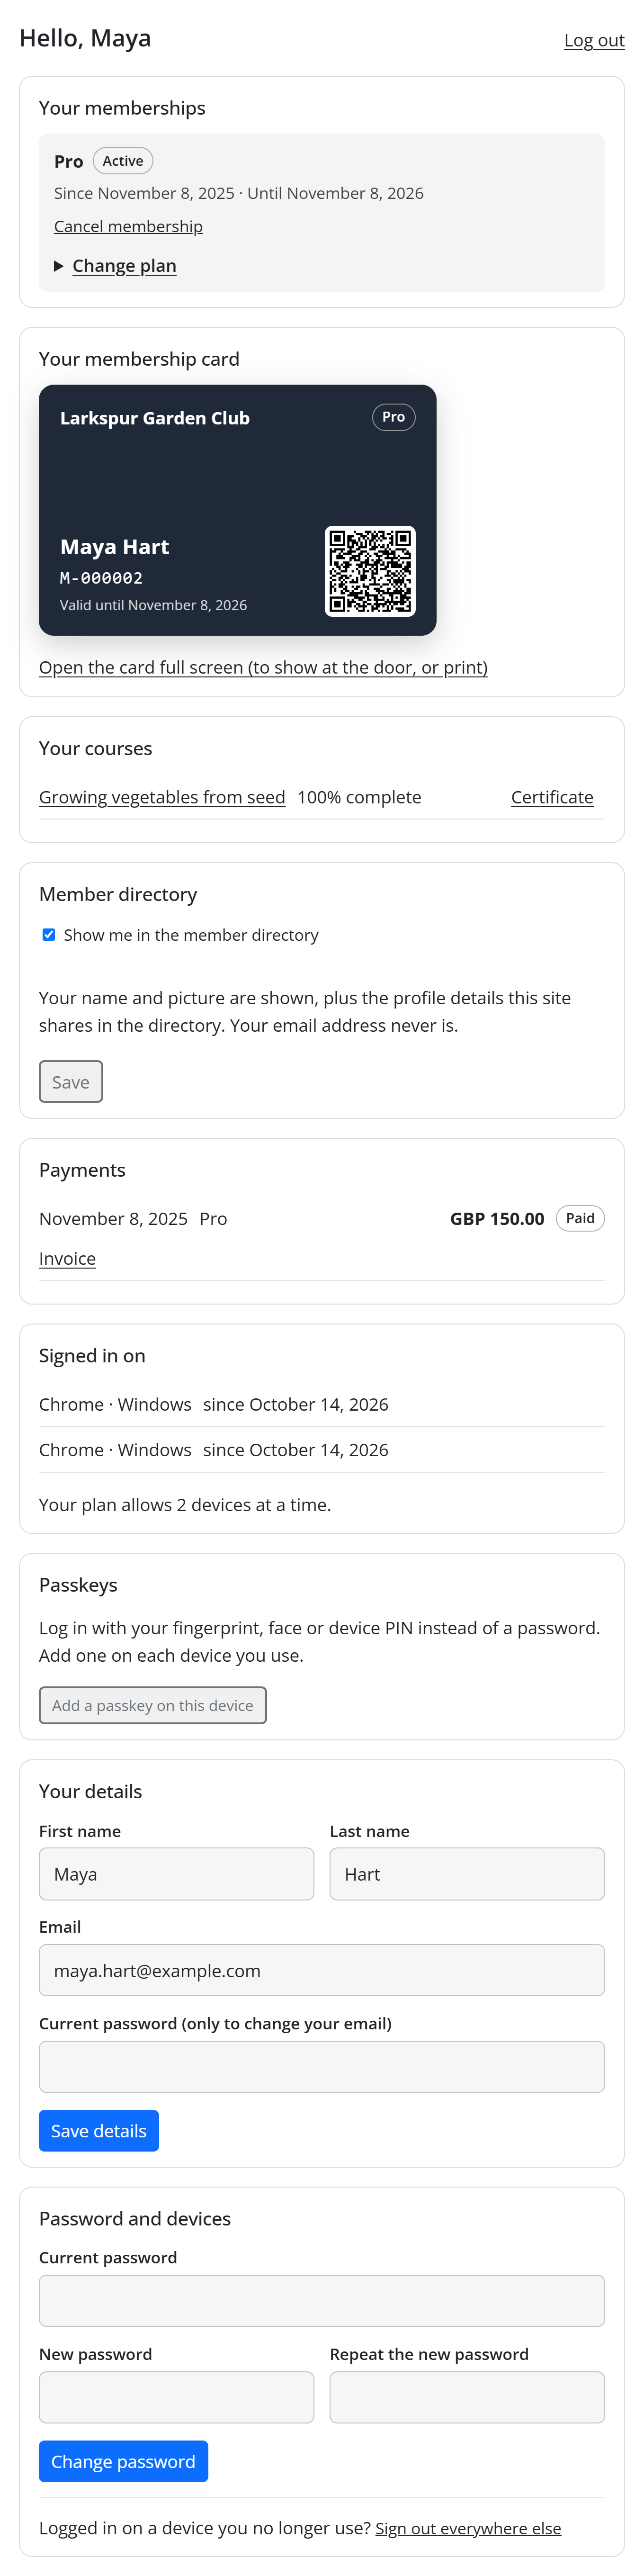
Your courses on the account page
Every course a student has started is listed under Your courses on their account page, with how far they are ("N% complete") and, once earned, a Certificate link.
Certificates
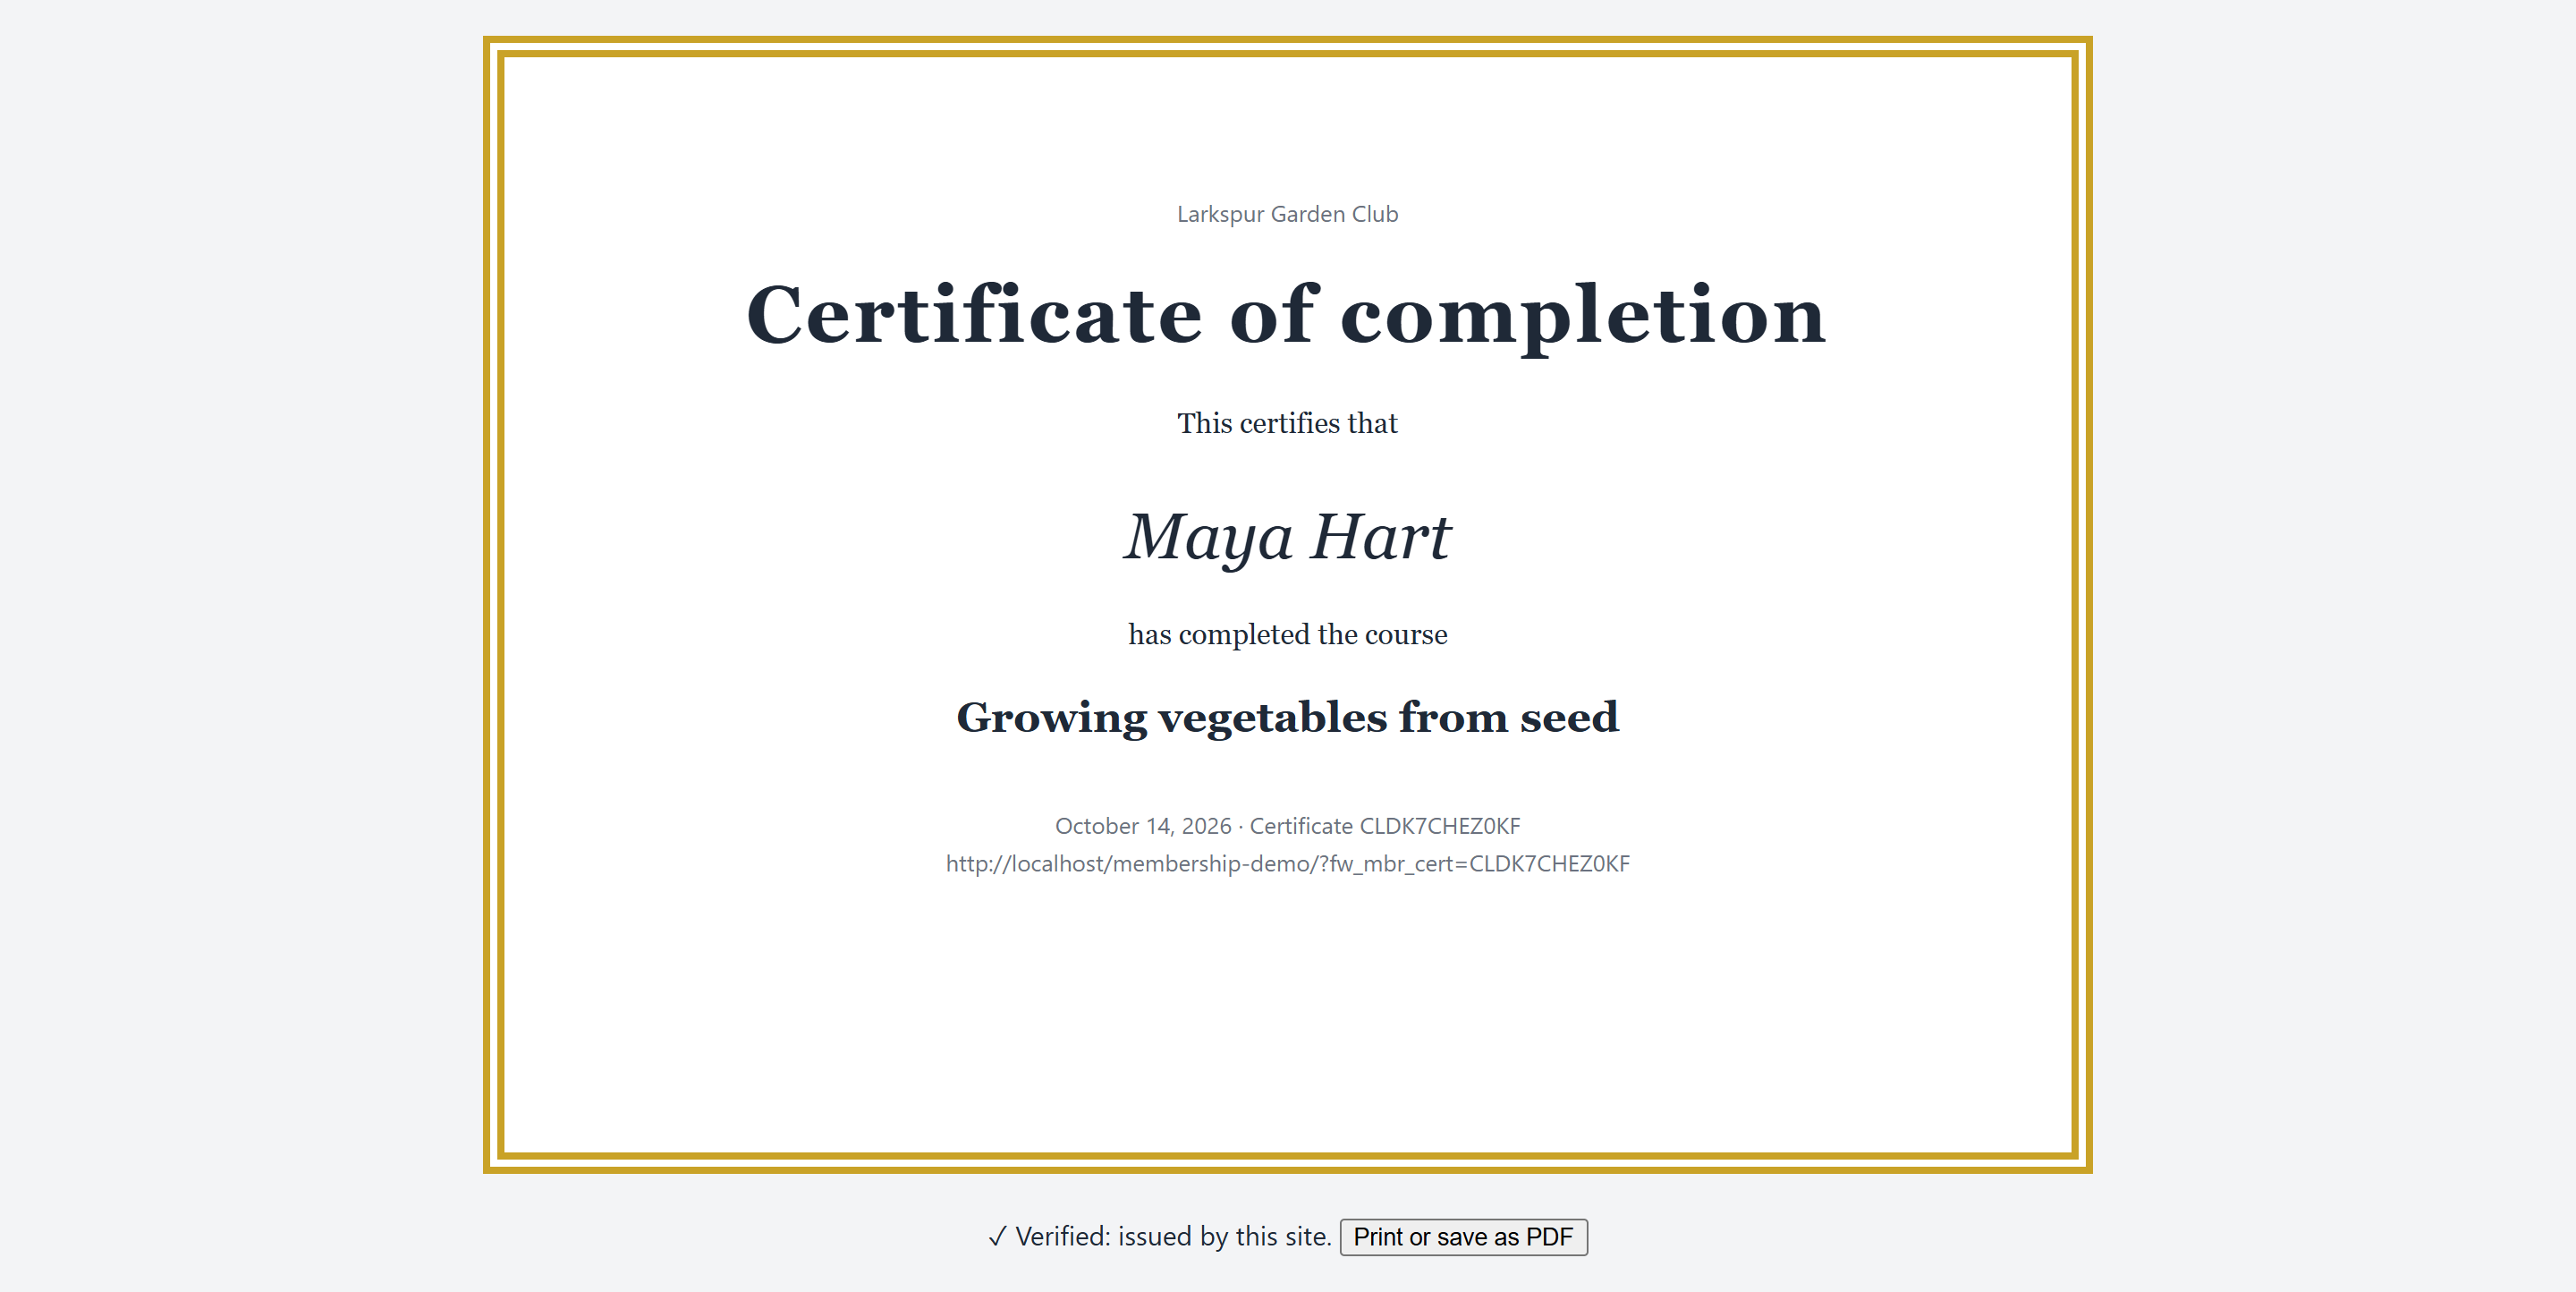
When a student completes every lesson of a course with Give a certificate when the course is completed ticked, they get a certificate straight away:
- It has a unique code (a
Cfollowed by 11 letters and numbers). - It lives at its own link on your site (your address with
?fw_mbr_cert=and the code). Anyone with the link can open it and see it is genuine, so a student can share it with an employer. A wrong code shows "No certificate has this code." - It is emailed to the student (see below), and linked from Your courses on their account page.
- Certificate pages are marked so search engines do not index them.
The built-in design
With Design (a page) left on The built-in design, the certificate is a framed, printable sheet with: your site name, Certificate of completion, "This certifies that", the student's name, "has completed the course", the course title, the completion date, "Certificate" and the code, and the verification link. Under it: "✓ Verified: issued by this site." and a Print or save as PDF button.
A certificate you design yourself
To match your brand, design the certificate as a page:
-
Create a new page (for example "Certificate design") and build it with the page builder: your logo, a border, a signature image.
-
Wherever the student's details belong, type these placeholders:
Placeholder Becomes {name}The student's display name {course}The course title {date}The completion date, in your site's date format {code}The certificate code {verify_url}The certificate's own link, for checking it -
Publish the page. (A draft cannot be used; the built-in design is used instead.)
-
On the course, choose that page in Certificate → Design (a page), and update the course.
When a certificate link is opened, your page is shown with the placeholders filled in, plus a green bar on top: "✓ Verified certificate (code), issued to (name)." with a Print or save as PDF button. When printed, your site's header and footer, the bar and the admin bar are left out, so only the certificate prints.
The design page is an ordinary published page, so someone visiting it directly sees the placeholders as typed. Keep it out of your menus and do not link to it. Do not lock it with an access rule either: the certificate is shown through that same page, so a rule on it would hide the certificate from anyone without access.
Print or save as PDF
The Print or save as PDF button opens the browser's print dialog. To get a PDF, choose "Save as PDF" (or "Microsoft Print to PDF") as the printer.
The certificate email
The email is Course certificate in Unyson+ → Membership → Emails, sent "When a student completes a course that gives a certificate."
- Default subject:
Your certificate for {course} - Default body: "Congratulations,
{first_name}! You have completed{course}. Here is your certificate (you can print it or save it as PDF):" followed by{certificate_url}.
Selling a course on its own
With the Payments module on, a course edit screen has a Sell on its own box (the same box as Pay-per-item):
| Field | What it does | Default |
|---|---|---|
| Price | The one-off price of the course, in your shop currency. Empty: not for sale. | Empty |
| Access for (days) | How long a buyer keeps access. 0 = for ever. | 0 |
Once it has buyers, the box also shows how many ("3 buyers so far.").
- Open the course and type a Price, for example
49. - Leave Access for (days) at
0for lifetime access, or set it (for example365). - Update the course.
People who cannot take the course now see a Buy this course for button with the price on the course page. It goes to the normal checkout, so coupons (like SPRING20), tax, invoices and every payment method work as usual. Buying the course opens its lessons for the buyer; members of the plans you ticked keep their access too.
To stop selling, empty the Price and update the course. People who already bought it keep their access to its lessons; only new purchases stop.
The Course Outline element
To show a course's outline anywhere (a members' home page, a "Start here" page), use the Course Outline element from the Membership tab of the page builder.
| Option | What it does | Default |
|---|---|---|
| Course | The course to show. "Courses are made under Courses in the admin menu." | "— Choose a course —" |
| Show the course title | Shows the course title as a heading, linked to the course page. | Yes |
It shows exactly what the course page shows: the progress bar, the Start / Resume button (or how to join), and the outline with ticks and padlocks. Only published courses can be shown. The Advanced tab holds the usual element settings.
Good to know
Do administrators see locked lessons? No lesson is ever closed to someone who can edit it, so you see every lesson open, without drip or quiz gates. Use a test member account to check the student's view.
Does progress need an account? Yes. Progress, quizzes and certificates are stored on the student's account. On a course open to Everyone, visitors can read the lessons but cannot mark them complete.
I turned on certificates after some students had finished. A certificate is issued at the moment a student completes the course. Students who finished before you ticked the box do not get one.
What does "complete" mean? A course is complete when every published lesson in it is complete. If you add a lesson later, students who had finished show less than 100% until they complete the new one.
Can a lesson belong to two courses? No. Each lesson belongs to one course. Duplicate it if two courses need the same material.
Can I drip a lesson and gate it with a quiz? Yes. A lesson opens only when both are satisfied: its day has come, and every gating quiz before it is passed.
Next steps
- Protected downloads: add worksheets to lessons.
- Drip content: open ordinary pages over time.
- Coupons: discount codes such as SPRING20 work on courses sold on their own.
- Back to the Membership overview.