Scroll Choreography — Live Editor & Keyframe Timeline
Both Image Scroll Choreography and Text Scroll Choreography ship with an on-page, live keyframe editor — a small panel that lets you scrub the scroll, retime keyframes on a per-layer track, tweak every value while you watch the pose change, and then save the result back into the element.
It's an authoring aid: it appears only for logged-in editors, rides on the element's opt-in guide, and never renders for your visitors.
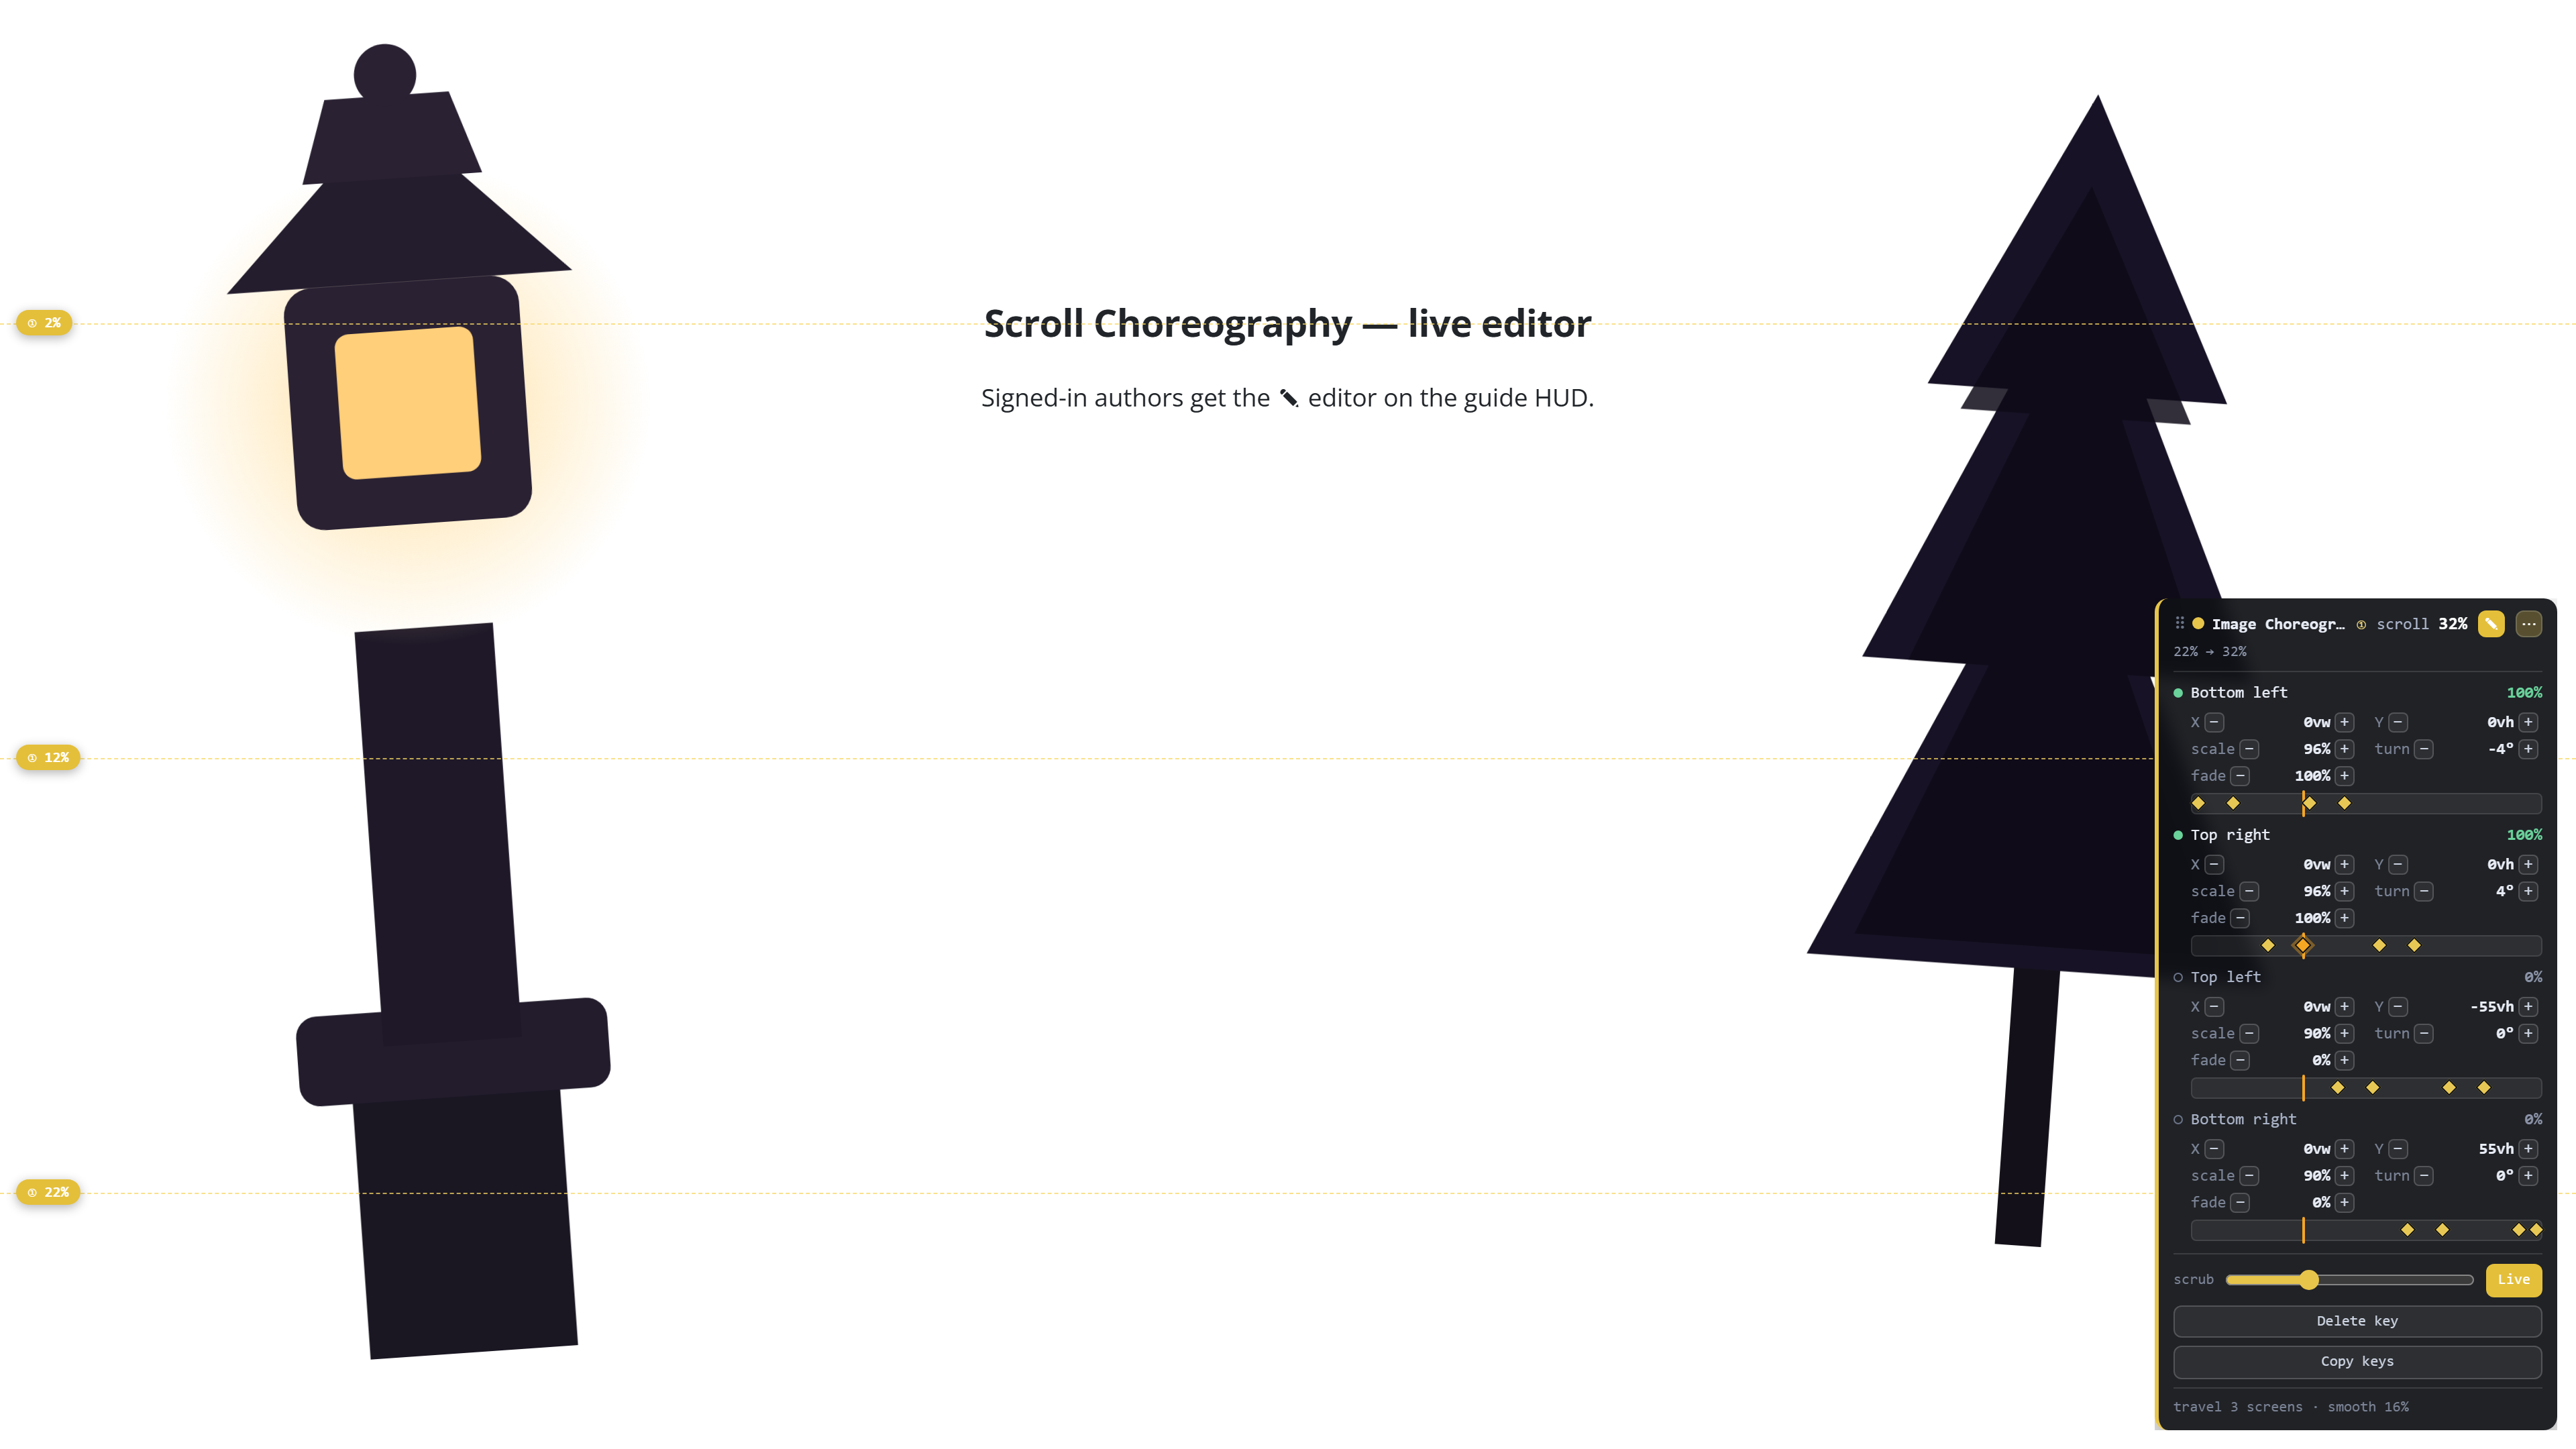
The scroll is your timeline
A video editor's timeline is a fixed strip of time. Here there's no clock — the page's own scroll is the timeline. So the editor's "timeline" is a 0–100% ruler of the scroll runway (the Scroll length you set on the Scene tab, in screen-heights). Every keyframe lives at a scroll percentage, and a playhead shows where the current scroll position sits. Scrubbing the playhead is scrolling the page — without you having to actually scroll.
Turn it on
- On the element's Scene (or Text) tab, switch on Show choreography guide.
- Log in to WordPress (the editor is hidden for logged-out visitors).
- Open the front-end of the page (not the builder canvas) and find the guide panel docked bottom-right.
- Click the ✎ button in the panel's header to enter edit mode.
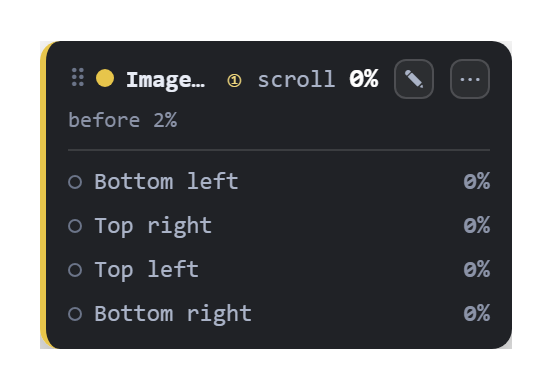
Before you click ✎ the panel is just a read-out — the live scroll %, and each layer's fade:
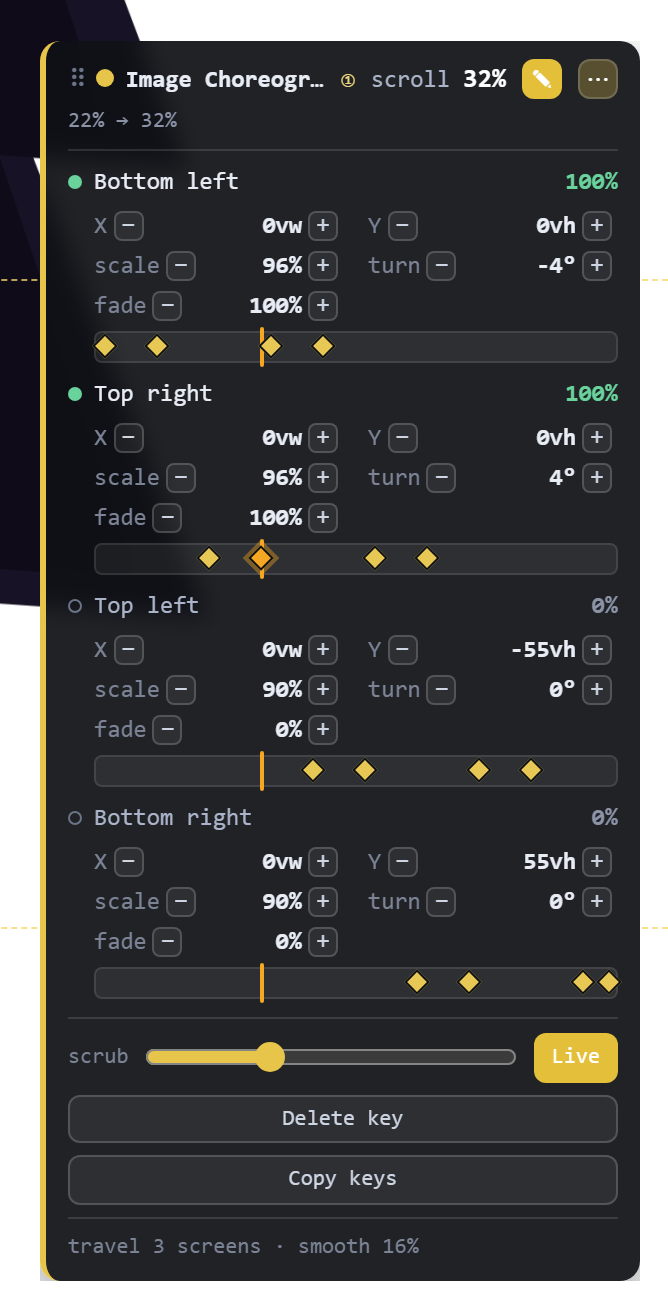
Click ✎ and it expands into the full editor — value grids and a keyframe track per layer, plus the scrub, Delete and Copy controls:
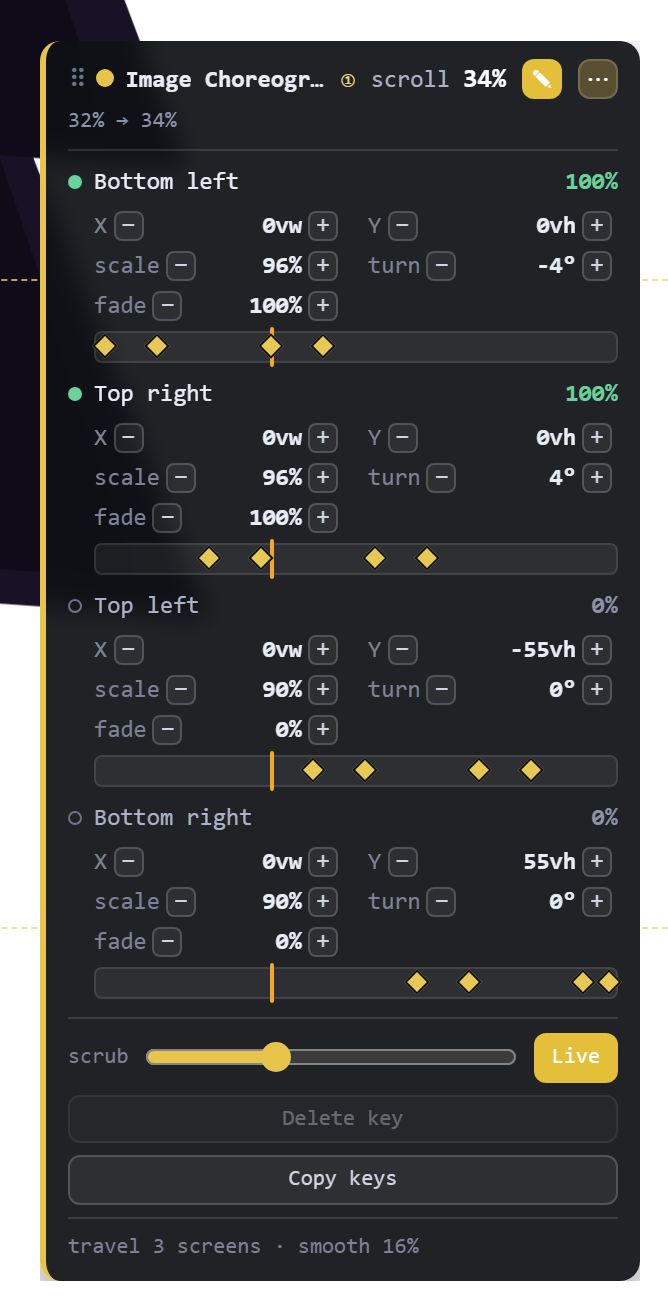
Anatomy of the panel
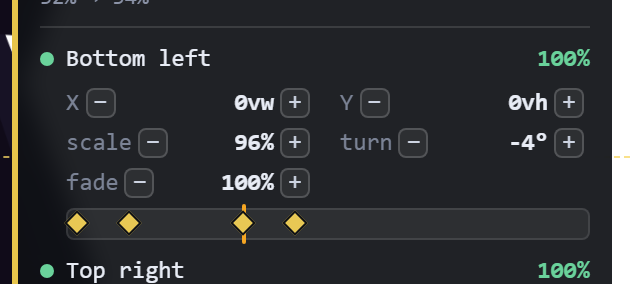
Top to bottom, the panel shows:
- Header — the element's name and number, the live scroll %, the current phase (which two keyframes you're between), the ✎ edit toggle, the ⋯ show-more toggle, and a ⠿ grip to drag the panel.
- Per layer (one block each):
- the layer name and its current fade %;
- a value grid — X, Y, scale, turn, fade — each with − / + steppers;
- a keyframe track — a 0–100% ruler with a diamond per keyframe and the orange playhead.
- Footer controls — the scrub slider, Live, Delete key, Copy keys, and a line of scene meta (travel · smoothing).
Working with keyframes
Scrub the playhead
Drag the scrub slider (or click a keyframe) to freeze the scene at any % without scrolling. The whole scene poses to that moment so you can inspect it. Hit Live to release the playhead and let the real scroll drive the scene again.
Select a keyframe
Click a diamond on a track. It highlights, the playhead jumps to it, and the ± steppers now edit that keyframe. Selecting a keyframe also enables the Delete key button.
Retime — drag a diamond
Drag a diamond left or right to move that keyframe to a new scroll %. It's clamped between its neighbours, so the order never breaks, and the pose updates live as you drag.
Add a keyframe
Double-click an empty spot on a track. A new keyframe is inserted there with the interpolated pose — so the motion is unchanged until you tweak the new point. Great for adding a "hold" or an overshoot mid-move.
Delete a keyframe
Select a diamond, then click Delete key. (Every layer keeps at least two keyframes, so there's always a from → to.)
Tweak the values
With a keyframe selected, use the ± steppers to nudge its X / Y (position, in vw/vh), scale, turn (rotation), and fade (opacity). The pose changes live at the frozen scroll position, so you can dial a pose in by eye.
Move the panel out of the way
Grab the ⠿ grip at the top-left of the header and drag the panel anywhere on screen — so it never covers the corner you're posing into. Each panel moves independently, and it remembers where you parked it (per browser) across page loads. Clear your browser's site data to reset it to the docked bottom-right.
Save your work — the round-trip
The editor tweaks the live keyframes; to make your edits permanent, copy them back into the element:
- Click Copy keys — the panel copies all layers' keyframes to your clipboard as JSON.
- In the element's editor, open the Advanced tab → Custom keyframes (from the live editor) and paste the JSON there. Save.
From then on the element renders those exact keyframes, overriding the Recipe and the per-layer Appear / Hold / Exit settings. Clear the field to fall back to the settings again.
:::tip Explore first, commit later A fast workflow: pick a Recipe (or set Appear/Hold/Exit) to get close, then open the editor, retime and tweak by eye, Copy keys, and paste into Custom keyframes to lock it in. The JSON is also a clean, versionable snapshot of a composition you can reuse on another element. :::
Good to know
- Author-only. The editor and its guide only render for logged-in users; visitors never see them. Turn the guide off before publishing if you don't want the page markers, either way.
- One panel per scene. A page with several choreography elements shows one guide/editor each — they stack (and each can be dragged out).
- Order matters. Copy keys emits layers in the same order as your images/lines, and Custom keyframes applies them by that order — keep the list aligned with your layers.
- Reduced motion. Visitors with prefers-reduced-motion get each layer rested on its held pose; the editor is an authoring tool and doesn't change that.
Where it works
The editor is shared by the two Scroll Choreography elements:
- Image Scroll Choreography — foreground images.
- Text Scroll Choreography — foreground type (with warp + text effects).